Why should you optimize images on your WordPress site? There’s a conundrum many website owners face: needing to showcase images on every page and in every post but, at the same time, large image size can actively slow down website load times.
Factor in image-heavy sites and you’ve got an even bigger problem. A slow-loading site in itself is bad enough, but slow site speed can increase the bounce rate and decrease the quality of the user experience for site visitors. Yikes.
Now before you delete all your images, there is a solution:
Learning how to optimize the images on your WordPress site. And luckily, there are tons of tools available that reduce image sizes, compress image files, change how they load, and more.
Let’s dive into our comprehensive guide on all the tips, tricks, and tools you’ll ever need to optimize your images for better site performance.
Table of Contents:
- Why Optimize Your Images in WordPress?
- Finding a Starting Point: Testing Site Speed
- Perform General Site Speed Improvements
- How to Optimize Images on WordPress Websites
- How Do You Optimize Images in WordPress?
Why Optimize Your Images in WordPress?
Before we begin discussing the various ways to optimize your site’s images, let’s first take a brief moment to talk about why you might want to do this in the first place. It’s not just a matter of saving storage space, optimizing your images can:
- Boost site load times and Google search rankings – Your site’s rank in search engines does partly depend on your site’s speed. Too slow, and it’ll appear lower in the SERPs. That’s why it’s so important to invest time in image optimization right away.
- Reduce overall site footprint – Compressing image files can help save space on your site’s server. And if you’re paying for hosting with a limited amount of storage space, this can be a real concern. Save space, save money.
- Reduce HTTP requests – When you optimize images on your WordPress, it also means reducing HTTP requests. This is hugely beneficial in several ways that we’ll explore later on.
Finding a Starting Point: Testing Site Speed
Before you dive headlong into the image optimization pool, you should get a general sense of where your site stands in terms of overall speed.
This is important because a speed test can tell you how quickly your site is currently loading and what potential issues you may need to solve. A full site speed test can tell you things like:
- Overall time to load your website.
- Time-to-first-byte (TTFB) or how long it takes for the server to respond and begin loading your website.
- The overall page size.
- The number of HTTP requests sent.
- A performance grade.
All of this is vital to know before you embark on image optimization tasks.
Why?
Because you can optimize images all day long but it won’t fix some of the more substantial and foundational issues your WordPress site might be facing. And while your images might be compressed and load more quickly, it won’t mean much if your TTFB is abysmal, for instance.
You can optimize images all day long but it won’t fix some of the more substantial and foundational issues your WordPress site might be facing.
So, to help you optimize your whole site better – not only the images – we’ll also go over the best speed testing tools and a few other tips and tricks on how to optimize your WordPress website.
Speed Testing Tools
To get a handle on your overall site speed, the following tools can help.
Pingdom

Set up a Pingdom account or start a free 14-day trial and you can quickly test page speed. Just enter your URL and you’ll get a whole host of information including load time, number of requests, how it does on the YSlow performance matrix, and more. From there, you can explore these results more deeply and view how your site performs on specific aspects, giving you a “to-do” list of fixes.
GTmetrix

Another option is GTmetrix. This service allows you to test your site’s speed for free. After inputting your URL, you’ll have to wait a moment while it analyzes your site. Then, it presents you with a full report, complete with a screenshot of your site.
The results show you the test server location and then lay out a performance score. Following that, you can see the page details, including how long it took for the page to load, the page size, the number of requests, and a letter grade for specific site optimization aspects (including image optimization).
PageSpeed Insights
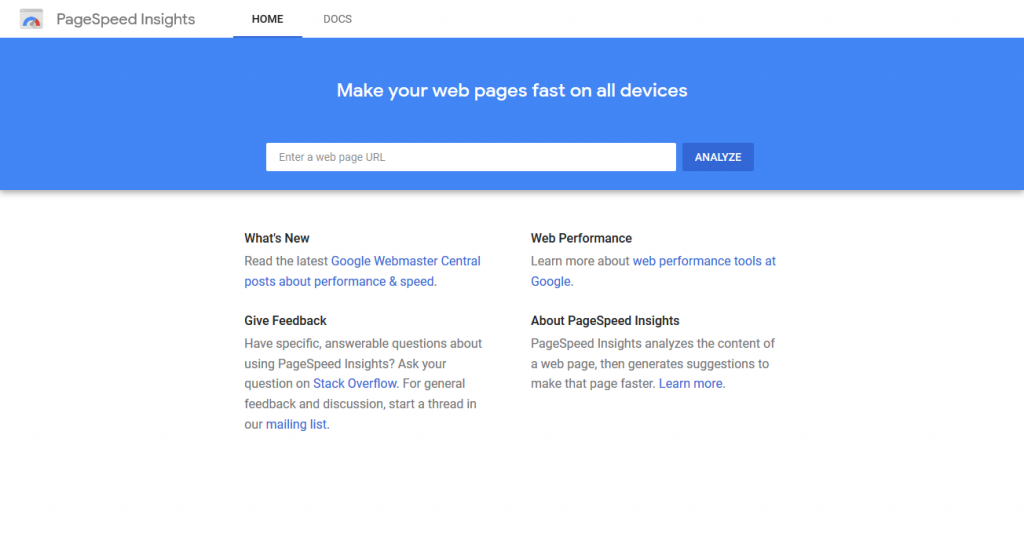
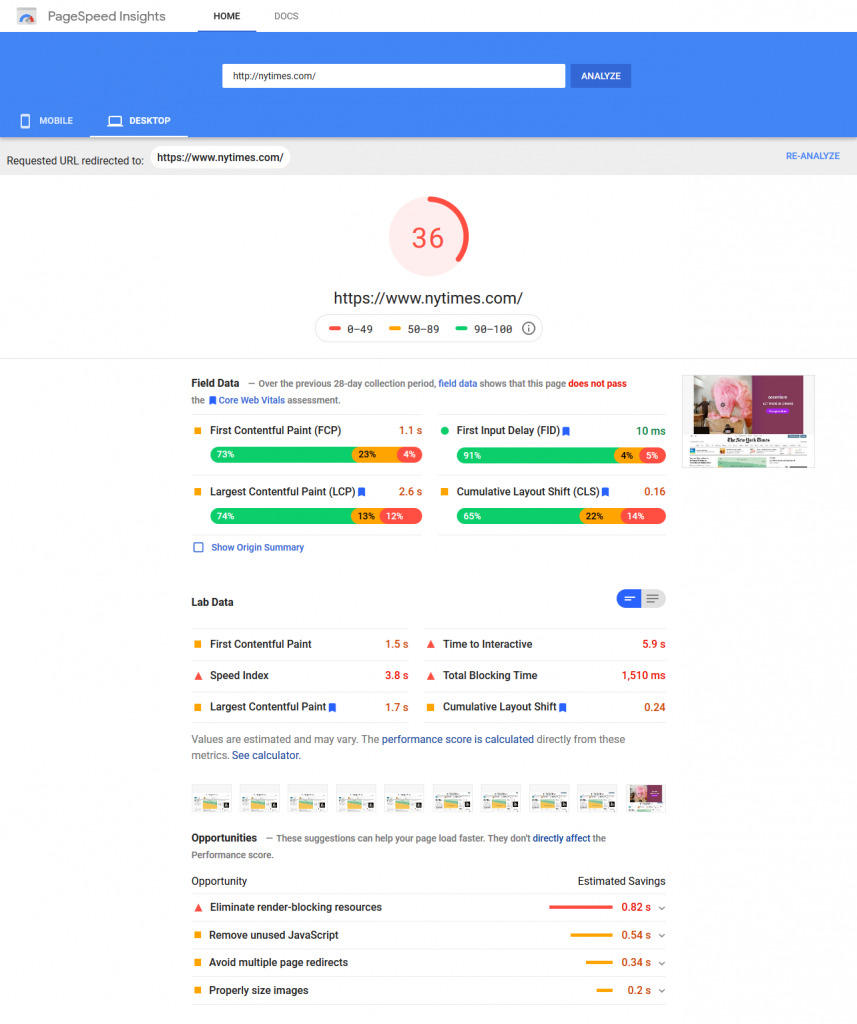
PageSpeed Insights is a free tool provided by Google that offers a quick look at your website’s speed. This one uses terminology that’s slightly more technical, like First Contentful Paint, Largest Contentful Paint, First Input Delay, and Cumulative Layout Shift.
Even so, it breaks down into more familiar terms as well as straightforward suggestions on how to speed up your site: “remove unused JavaScript,” or “properly size images.” It also provides an analysis of how much your site would speed up if you implemented these changes.
UpTrends

UpTrends is a full-fledged website monitoring service. With it, you can test your site’s speed using a real browser from a variety of worldwide checkpoints to get a true sense of how it’s performing. UpTrends also provides load time alerts, error alerts, and more. With them, you’ll always know how your site is doing, even when you’re not actively checking.
Yellow Lab Tools
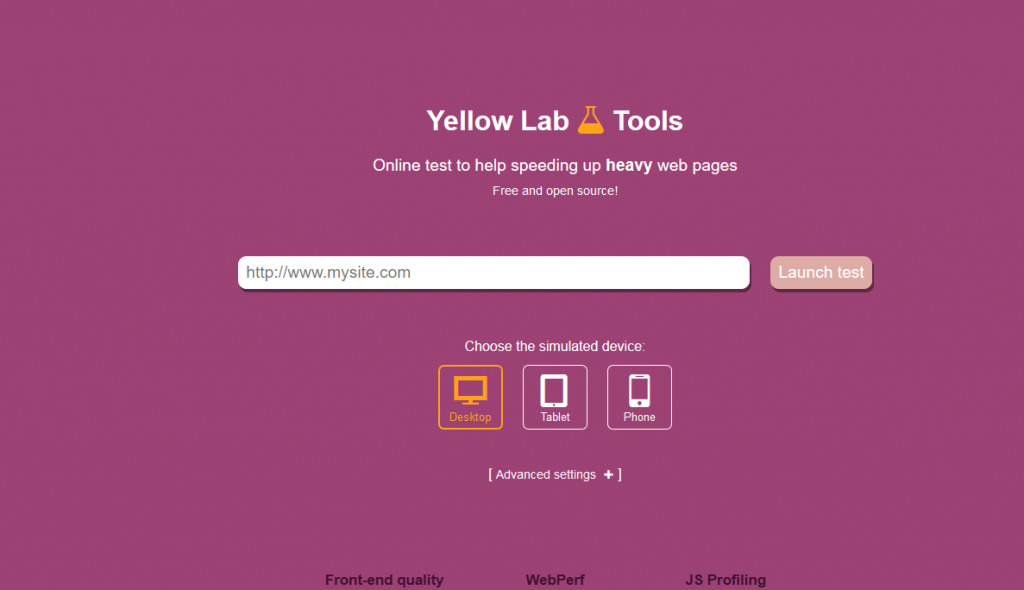
Here’s another free tool for testing site speed.
Input your URL, select the simulated device from which you want to perform the test and you’re good to go. Once the site has been analyzed, you’ll get results that show your site’s overall speed score as well as details like the page weight, requests, DOM complexity, JavaScript issues, jQuery issues, CSS, web fonts, and server config. It also breaks down each of these categories into specifics that highlight exactly what is wrong with your site so you can make targeted improvements.
As you can see, there’s some general overlap between all of these tools but they all provide slightly different information.
Use the free tools to get a sense of where your site stands, then consider investing in a premium option if you need further detail and/or prolonged monitoring.
Perform General Site Speed Improvements
Now that you’ve completed your site speed test(s) you can get on with making the necessary changes. Your speed tests will likely offer some amount of detail as to what your course of action should be. But as a general guideline, we’ll go over some of the key areas to pay attention to when making site improvements that affect speed.
Add Caching
Caching is a process where files are copied and stored temporarily. The most typical example of this is when you visit a website, your web browser will store a copy of its files so that when you visit it again at a later date, it will load much more quickly.
When you add caching to your site, it tells the server to store a temporary copy of its files for quicker access and loading. This can speed up site load times considerably.
And don’t fret: it’s pretty easy to add caching to your site. In fact, the following WordPress plugins make it a snap.
W3 Total Cache

This plugin relies on a CDN to speed up site load times and improve overall site performance. It prioritizes SEO, conversion rates, bandwidth savings, and improved server performance.
WP Super Cache

Another plugin to consider is WP Super Cache. This one works by creating static HTML files of your site that can be accessed more quickly, making load times much faster. Most visitors will receive this static version of your site’s pages (versus dynamically created ones).
LiteSpeed Cache

Then there’s LiteSpeed Cache, which offers server-level cache optimization as well as many other features for speeding up your site and improving overall performance. It works with multisite and many popular WordPress plugins as well.
WP Fastest Cache

Here’s another streamlined option for adding caching to your WordPress site. It works the same as the above and has a slim profile as well. It also aids in optimizing for search and SEO. The setup is super simple, too.
Cache Enabler

Or you could try Cache Enabler. It offers the same functions as the other caching plugins listed here as well as automated and manual clearing of the cache, WP-CLI cache clearing, an expiry directive, and more.
Hummingbird

Lastly, there’s Hummingbird, which offers a multi-faceted approach to improving site speed. It provides caching features alongside file compression, minification tools, lazy loading, and more.
Use a CDN
Hosting your site with a server that has a CDN can have an enormous impact on site speed as well. This means your site files rest on a multitude of computers in different locations of the world. When someone requests to see your site, they will receive the files from the server nearest to them, effectively reducing download time.
Jetpack CDN

Jetpack offers a wide range of tools for optimizing your WordPress site. One is called Site Accelerator (formerly Photon) and it works by optimizing your site’s static files and delivering them from their CDN. It has an option to optimize images, too!
Cloudflare

Cloudflare is one of the most popular CDNs on the planet and delivers content quickly and efficiently. It includes a variety of controls over how to cache your content as well, is well-documented to save bandwidth, and optimized for delivering video, too.
StackPath (formerly MaxCDN)

Or you could opt for StackPath, which offers improved content caching (and purging), a variety of customization options, over 40 different PoPs that deliver from all over the world, SSL, analytics, and more.
KeyCDN

Still another option is KeyCDN. This content delivery network is easy to set up and makes use of up-to-date hardware, a global network, image optimization, API, and other features.
Amazon CloudFront

Amazon CloudFront is another choice that can help speed up your website overall. It works by delivering static files, videos, images, apps, and APIs to people all over the world with low latency.
Fastly

Lastly, there’s Fastly – ha! – which offers reliable content delivery on a customizable edge cloud platform. It’s designed to serve content quickly, including videos, all while managing security features and performance optimization – even in times of super-high site traffic.
Use Lazy Loading
The last general optimization feature we’ll be discussing here is lazy loading. This is a funny way to optimize images in WordPress without doing anything to the actual images. It means that your site only loads what is immediately visible to your visitors.
In short, content that’s “above-the-fold” loads first and the rest if and when the visitor scrolls down the page. This way visitors aren’t greeted with awkward, partially loaded images and such. Thankfully, many WordPress plugins take care of this as well.
Jetpack

We already mentioned Site Accelerator above, but Jetpack also has a lazy loading feature that streamlines how your content loads. This is a foundational feature in Jetpack. Once installed, you can activate lazy loading to ensure all images will only load upon scrolling.
Smush

Smush is a general image optimization plugin (which we’ll discuss in more detail below) but it’s worth mentioning in regard to lazy loading as well. This plugin enables you to load images only when a visitor scrolls to them with a simple toggle switch. In conjunction with its compression features, this is a powerful plugin.
Optimole

Optimole is another WordPress plugin to optimize images that we’ll explore further below, but it offers lazy loading as well. A toggle switch enables this feature so images only load when viewed, reducing server load and overall page load times.
Autoptimize

Autoptimize is an “all-in-one” style plugin that provides optimization for your entire site. And while it can minify scripts and such it can also provide lazy loading. It even has support for WebP and AVIF formats.
Lazy Load – Optimize Images

As its name would suggest, this is another plugin that aims to streamline how your images load and what the overall user experience on your site is. It works to reduce HTTP requests, improves loading time, and more.
a3 Lazy Load

Or you might want to check out a3 Lazy Load. Here’s a plugin that puts mobile optimization above all else. It improves page load times by lazy loading images and streamlining the user experience. No one wants to have to wait for content to load and this plugin ensures they won’t have to.
WordPress Infinite Scroll

This is a plugin that adds the lazy loading feature to your site so that images, posts, pages, comments, and more load only when a visitor scrolls. It offers compatibility with popular plugins like WooCommerce and Easy Digital Downloads, making it a solid choice for online stores with lots of products, too.
How to Optimize Images on WordPress Websites
With the general optimization stuff out of the way, we can now narrow our focus to just images. We did touch on some aspects of image optimization above but really, just nibbled around the edges of the topic. Now it’s time to go in-depth.
Image optimization can involve a variety of different steps. We’ve talked about lazy loading and CDNs already. These two elements play vital roles in how your images load. Next, we’ll talk about what you can do with the images themselves to minimize their footprint and otherwise optimize them for speedy load times.
Use the Right Image Format
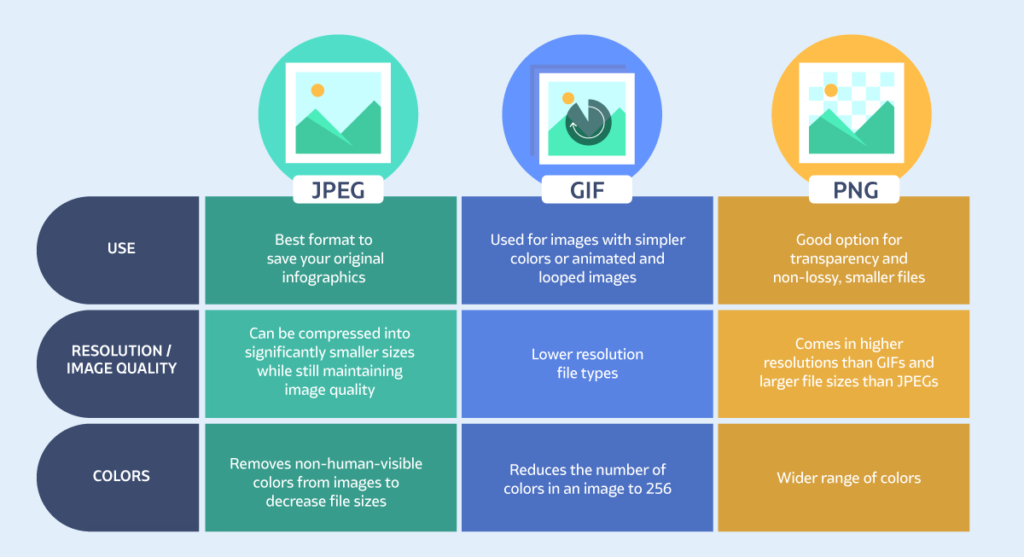
Knowing when to use a specific image format is another way to optimize your images and improve site speed in WordPress. For a long while, there have been two standard-bearers in online images: JPEG and PNG. But GIF and TIFF are important as well.
JPEG
JPEG stands for Joint Photographic Experts Group and has become a real standard in compressed images. JPEGs most often have a 10:1 compression ratio. This means that an image that starts at 10 MB would end up at just 1 MB in JPEG format. Though it’s pretty good at preserving image quality, some data compromisation and loss still occurs.
And this is because JPEG is a lossy image format. So, if you export an image as a JPEG, whatever data was removed to reduce its size is lost forever. And if you ever need to make more edits to this image, even more data will vanish. Over time, this has a serious effect on image quality. JPEGs are best reserved for photographs.
PNG
PNG, on the other hand, stands for Portable Network Graphics. It uses a different type of compression that doesn’t eliminate pixels or data to achieve a smaller file size. It’s lossless so it can be edited over and over without compromising its quality.
PNG is the preferred choice for graphics that include text or highly detailed vector designs. PNG also supports transparency, making it the go-to choice for logos and overlaid graphics.
GIF
GIFs are seemingly everyone’s favorite way to communicate online these days. Bite-sized animations and video clips spread around the web at a breakneck pace, often serving as reactions or responses on social media.
However, they’re also increasingly found in blog posts. And for that reason, it’s important to know when and how to use them. This image file format is best for animations, buttons, and some ads.
TIFF
TIFF isn’t really a file format that’s intended for the web, but we wanted to mention it anyway because there might be some instances where you require it.
For instance, TIFF is a solid format to choose, if you need to offer editable digital image files. But again, it wouldn’t be to display the images on your site; rather, to offer them as downloadables, which is a different thing altogether.
You may also wish to offer TIFF image files if you plan on providing printable versions of your photos.
Newer Formats
But times are changing and new image formats come out all the time. A few currently gaining steam include:
WebP – This new format was developed by Google and designed to create one single format that could handle every type of image needed online. The goal here was also to create a format that delivered smaller files than JPEGs without sacrificing image quality. It’s lossless, supports transparency, and can handle animations. The format isn’t yet supported across all browsers but it’s gaining traction quickly and currently has support in Chrome and Android devices.
HEIC – Here’s another new format that is changing how images may be handled on the web in the future. HEIC boasts of numerous features including “multi-frame images with multi-frame compression,” according to FreeCodeCamp, which are required for multi-view images. But beyond that, these files can also contain a ton of non-image data. They’re most often used for handling 4k and 8k resolution displays. This format is native on Apple devices and is currently supported by iOS.
So, keep in mind that choosing the right format for your images based on their intended purpose will help your site load more quickly and efficiently in the long run.
Resize Images Properly
You should always aim for displaying high-quality images on your site. As displays feature ever-higher resolutions and with the addition of retina-ready displays and 4K, it’s important to upload images that can withstand that level of scrutiny. However, it’s equally important to recognize and work within the limits of your theme.
There’s no reason to upload an image with a super high resolution or at print quality if it will appear at a smaller size.
Any theme you use should come with documentation that indicates how large header, featured, and blog post images should be. There’s no reason to upload an image with a super high resolution or at print quality if it will appear at a smaller size. Basically, one way to optimize images in WordPress is to ensure they are large enough and at a high enough resolution to look good on any device but no larger than that.
Likewise, you should crop images appropriately. If your site uses a header image that’s 1500 x 400 px, there’s no reason to upload an image that’s 1500 x 1000 px. Crop images to the exact size that you will display them in. This will aid in load time and save you storage space as time goes on.
Luckily, you won’t need a separate tool or plugin for this:
WordPress has a built-in image editor where you can crop images of any size before inserting them into posts or pages.
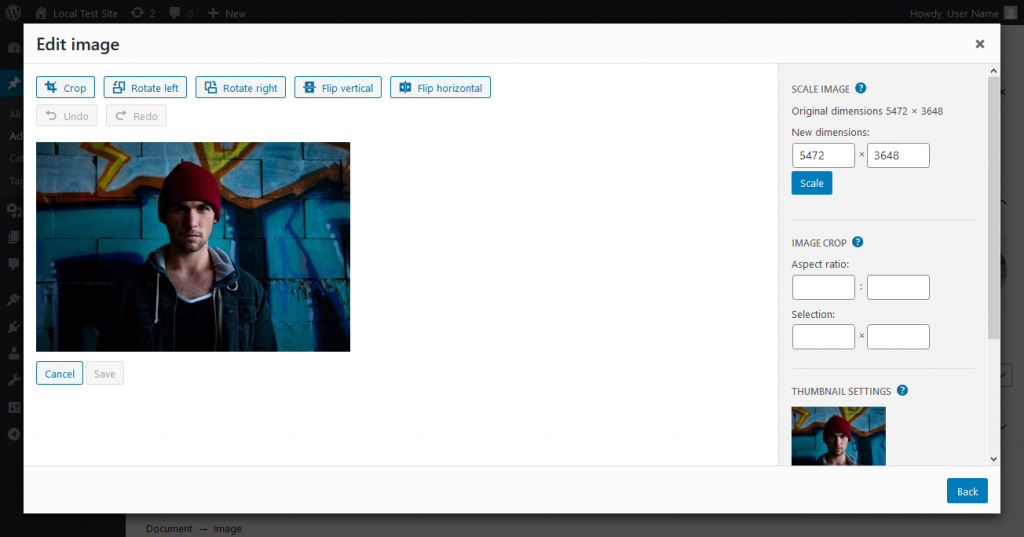
Also, WordPress is now serving images of different sizes on different screen dimensions via srcset which helps to speed up load times considerably on mobile devices. The best part is that it’s a native function within WordPress (since version 4.4) so the CMS helps you optimize images without you having to do anything to configure it.
Use External Tools for Image Compression
By now you should have a clear idea of some of the image formats to use and how to resize images manually. Next, we can start discussing a variety of external tools and websites you can use to compress images, reduce their file sizes, and ensure your site loads faster.
TinyPNG
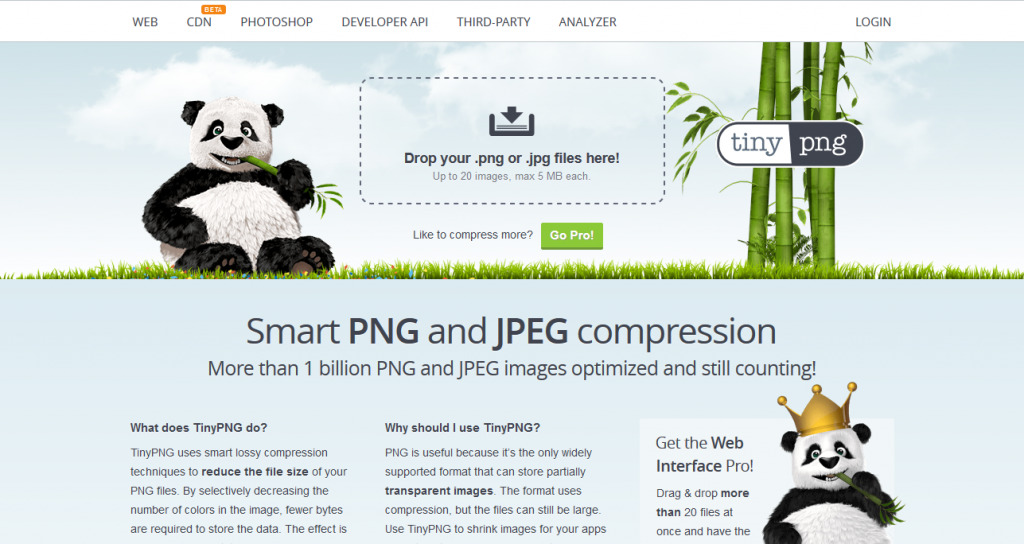
TinyPNG is a convenient little tool you can use on the fly. Simply drag and drop up to 20 JPEG or PNG files onto the upload box (no more than 5 MB each) and watch as they are compressed one by one. It works quickly and easily, often reducing file size dramatically.
If you have more robust image compression needs, they offer a premium plan that you can access from the same web-based interface.
The Pro plan lets you:
- Upload more than 20 images at a time.
- Upload images that are up to 75 MB each.
- View a variety of statistics about your image compression efforts.
Pricing starts at $25 per year.
ImageOptim
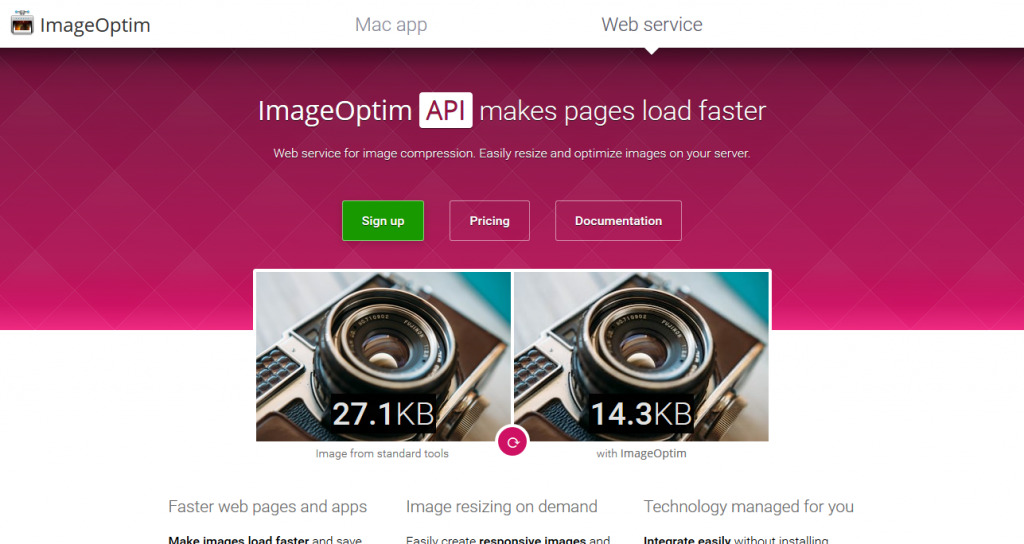
ImageOptim is another optimization tool that you can use to reduce the footprint of your images. It lets you save images for the web in a more efficient way. This downloadable app reduces image file sizes but uses a variety of compression techniques that don’t sacrifice quality. The tool removes private EXIF metadata, comments, color profiles, thumbnails, and more.
To use it, just drag-and-drop your images onto the optimization window and watch as they’re compressed. It’s available for Mac only but they do offer a web service API that allows for web-based image compression.
The API is a paid service, however, so you can expect to pay $12 per month for 2,000 optimizations, $49/month for 16,000 optimizations, and $245 for 100,000 optimizations.
JPEG Optimizer
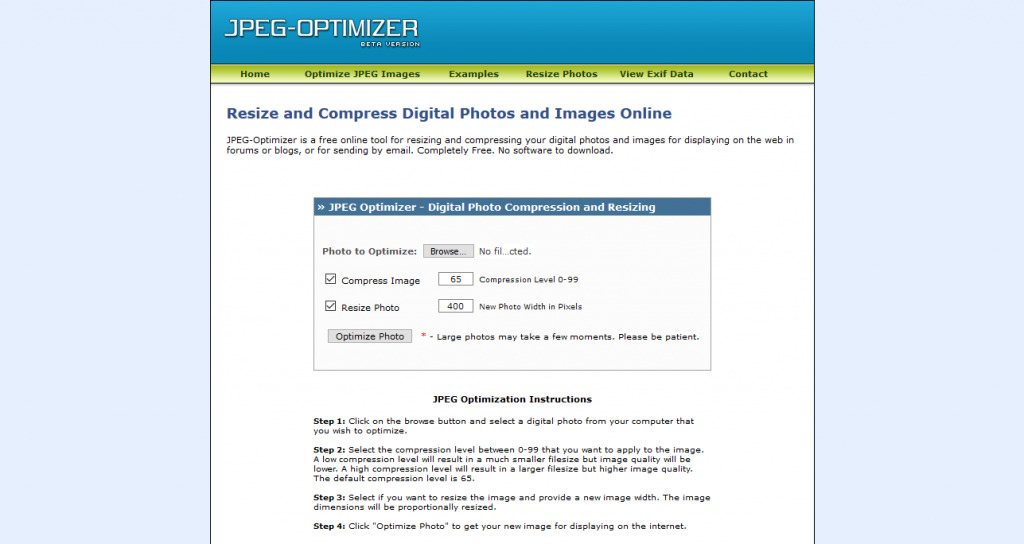
Here’s a quick and easy-to-use free tool that allows you to compress JPEGs straight in your browser. To use it, just select a file from your computer then check the boxes next to Compress Image and/or Resize Image, depending on what you want to do.
When selecting a compression level, you’re given the option to choose between 0–99. If you select a low number, the file size will be very small but the image quality will suffer. On that same note, a higher number results in a higher quality image but a larger file size. This tool defaults to 65 as the recommended compression level.
When resizing photos, you can select the maximum width you’d like the image to be. This will resize the image proportionally based on that width. All there is to do after that is to click Optimize Photo. The process plays out and you can download your image.
Kraken.io
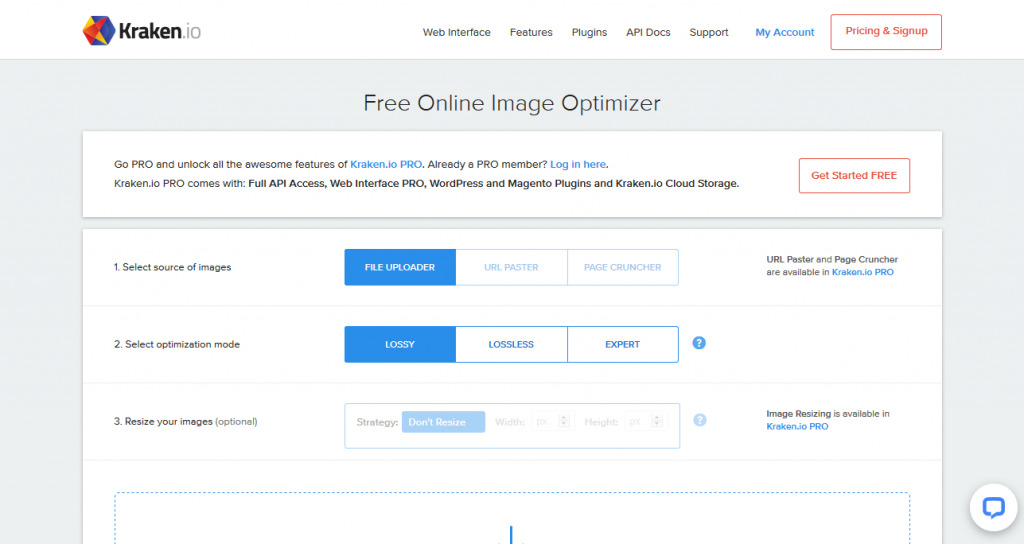
Kraken.io is a robust web-based image compression tool that you can use to compress JPEG and PNG files. The free version allows you to do quite a bit, including uploading from your computer and selecting an optimization mode (lossy, lossless, or expert). You can also upload several images in a .zip file.
The Pro version offers quite a bit more, however, like the ability to compress images from a URL or a web page, the ability to resize images, full API access, and Kraken.io Cloud Storage. You also get access to the related WordPress and Magneto plugins to correctly optimize images on your site. However, the WordPress version hasn’t been updated for a year, which is why it’s not on the list of recommended plugins below.
Kraken.io Pro pricing starts at $5/month and goes all the way up to $79/month for enterprise plans.
Photoshop
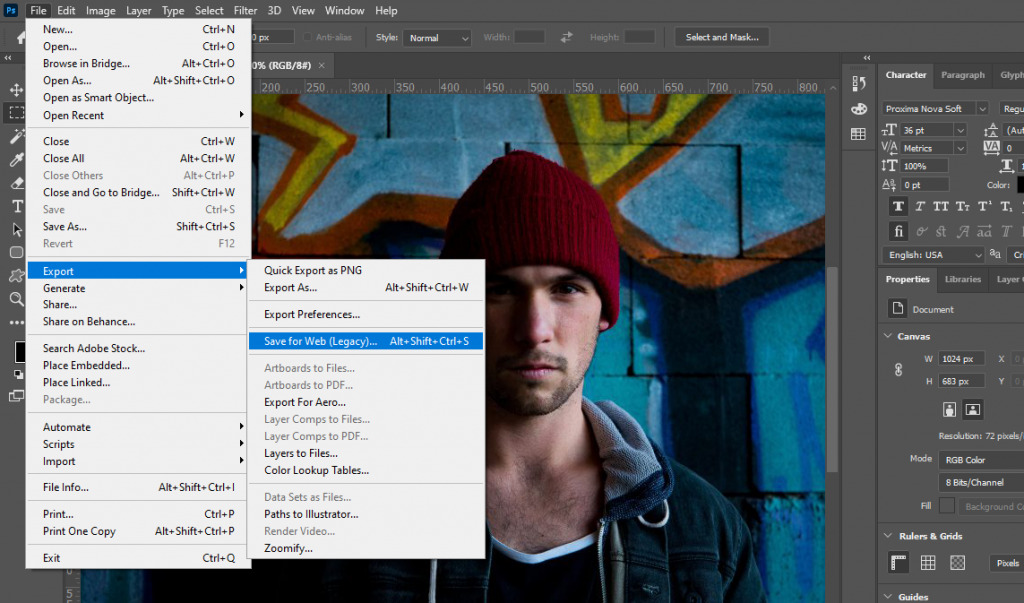
Though it won’t render the most compressed images on the planet, choosing the Save for Web feature in Adobe Photoshop while exporting an image is always a good idea. It’s a quick and easy way to reduce file size and make your images more web-friendly.
Photoshop pricing starts at $20.99/month.
Use Image Compression Plugins
The external tools discussed above are super useful and work well for optimizing images, no doubt.
However, if you have an extremely image-heavy site, going through this manual step can be quite laborious and time-consuming. You have to upload your images to the compression tool, optimize them, download them again, and then upload them to WordPress.
Makes you a bit dizzy just thinking about it, doesn’t it?
To save time and complication, you can instead use an image compression plugin. These reside directly in WordPress and most often compress and optimize images as you upload them. This all-in-one aspect makes plugins a go-to choice for many WordPress developers and site owners.
It’s always a good idea to do a little background research about new plugins before installing them – image optimization related and not.
Now, before you go installing any of the plugins below, it’s important to make note of a few things.
- Understand the background of the plugin you’re using. Who makes it? How many people have downloaded it? What rating does it have? What do reviews say? It’s always a good idea to do a little background research about new plugins before installing them – image optimization related and not.
- Installing new plugins can affect your site’s overall performance. Some are really taxing and can hold back performance quite a bit. To ensure any plugin you select isn’t going to be a problem, first, run a speed test on your site as it is now. Then, install the new plugin and run another speed test. If you notice a considerable dip in page speed, it’s probably best to try and find another tool that doesn’t use so many resources. Otherwise, you might negate any benefits you gain from optimizing your images.
With those caveats out of the way, let’s dive into our list of the best WordPress plugins for image compression.
Smush

Smush is a plugin by WPMU DEV that provides tons of image optimization features for free. It gets its name from the free image “smusher” tool they’ve provided for many years. But the plugin includes several other features as well, including:
- Image compression: lossless compression removes excess data without sacrificing image quality.
- Lazy loading.
- The ability to compress up to 50 images at once.
- Resizing images.
- The ability to optimize images automatically when they’re uploaded to WordPress.
- Max image size is 5 MB.
- Compatibility with Gutenberg and Multisite.
If you need more features, WP Smush Pro is a great choice, too. It offers better smushing capability, image backups, support for images up to 32 MB, auto image resizing and scaling, and the ability to smush an unlimited number of images at once.
ShortPixel

Another great option is ShortPixel. This plugin has a free and premium option, both of which could prove useful for optimizing images.
The free version includes a decent list of features, including the ability to compress all new and past images (including PDF documents) with one click. You can also configure this plugin to compress any new images that are uploaded to your site. It can also resize and rescale new images to suit your site and theme.
Shortpixel has solid compatibility with most of the popular slider, gallery, and e-commerce plugins, too. However, you can only compress up to 100 images per month.
The premium version tacks on priority support and, depending on the plan, you can expect to pay $4.99, $9.99, or $29.99/month for the ability to compress up to 5,000, 12,000, or 55,000 images, respectively.
Optimole

Optimole is another fantastic plugin option to help you compress and optimize images on WordPress sites. It allows you to process images in real-time and with its cloud-based platform, your site is never stressed by the load of this plugin’s work.
It automatically optimizes images when you upload them to your site. The plugin also selects the right image sizes for the visitor’s browser and viewport size. Plus, it serves up images via a dedicated image CDN. Finally, Optimole supports lazy loading.
The free version is intended for sites that get 5,000 visits monthly and comes with 48-hour email support. Premium plans start at $19.08 for sites with 25,000 visitors a month and 12-24 hour support and go all the way up to $359/month for up to 3 million visits monthly, a custom domain, a site audit, and live chat support.
EWWW Image Optimizer

EWWW Image Optimizer is another plugin option. It supports unlimited file sizes and has no speed limits. It also includes conversion options for swapping out image formats to better suit your site’s needs.
While the base plugin is free, the premium service can provide up to 80% compression and server-side functions, taking the burden off your site. Support questions are answered both for free and premium users (with premium ones getting priority, of course). This service also backs up the original versions of your images for 30 days should you ever wish to revert them.
On premium plans, you pay per image. Access to the Compress API key starts at $0.002/image but doesn’t include image resizing and scaling or CDN. However, you can opt for Easy IO instead and pay between $5-15/month to add these features and more.
Optimus

Optimus is another WordPress plugin option that helps you optimize and compress images on your site. The biggest benefit here is automation. As you upload images, they’re compressed automatically and up to 70%.
This level of compression can substantially improve your website’s performance. The best part is that it’s lossless compression, so image quality is not affected.
However, the free version of this plugin only compresses images that are 100 KB or less, so that’s not going to be very useful to you. The premium version supports compression for images up to 10 MB each, as well as HTTPS, WebP conversion, a developer API, unlimited images, hosting, and more.
If you only need this service for your own site, Optimus HQ is the right plan for you, which clocks in at $29/year. If you require image compression for customer or client sites, the Optimus HQ PRO plan will work best, which is priced at $149/year.
Imagify

Imagify is another way to speed up your site through image optimization. It’s literally like flipping a switch. Once you install the plugin and enable it, all your images and thumbnails will be automatically optimized as they’re uploaded. This plugin also makes it possible to convert images to the WebP format. Plus, it offers compatibility with NextGen Gallery and WooCommerce.
The free plugin allows you to upload and optimize up to 25 MB of images per month. However, there’s no limit on converting images to WebP. The paid plans start at $4.95/month and go up to $69.99/month and offer a range of 1 GB up to 50 GB of image data per month.
WP Compress

If you’re looking for something lightweight yet effective, WP Compress is another good choice. It includes a bunch of features in addition to image optimization, such as client reporting, monthly client quotas, remote configuration and optimization, and bulk website linking. It offers local and live optimization modes, too.
On the local front, you can compress images in your media library as well as image thumbnails directly on your site. You can also convert images into the WebP format. But if you’d rather opt for live optimization, the plugin can also compress images server-side. It works with adaptive images, Retina displays, and utilizes lazy loading, too.
You can count on fast load times thanks to hybrid CDN support via Google Cloud and BunnyCDN. Compressing all images in one go is also an option. Plus, if you make a mistake, a one-click restore feature is available as well.
The Pro addon offers extra features like branded reports and the ability to serve CSS and JavaScript via CDN. Pro plans range in price from $5-$25/month.
Compress JPEG & PNG

This one ought to look a bit familiar! It’s the plugin version of TinyPNG, which we discussed above. This versatile, simple, and easy-to-use tool integrates with TinyPNG and TinyJPG, offering built-in compression.
You can configure the WordPress plugin to optimize new images when they’re uploaded, perform background optimization, bulk optimize old images, auto-resize images by setting a maximum display width and/or height, and even compress animated PNGs.
This plugin is compatible with WooCommerce and WPML and it includes a dashboard widget that informs you of how much space you’ve saved.
The free version lets you optimize about 100 images. You can upgrade to a paid plan, however, which removes the file upload limit and offers flexible pricing.
Imsanity

Imsanity is a powerful free plugin that lets you compress images quickly and efficiently. The idea here is that you’ll scale down large images to a more “sane” size by comparison. You can resize images already on your site using a bulk-resize feature. The plugin also has the option to set a maximum width and/or height so that images will be automatically resized to these dimensions whenever you upload a new image.
Imsanity also converts BMP and PNG files to JPEG, should the need arise. What’s interesting here is that this plugin uses the built-in image scaling features within WordPress to perform these actions automatically or in bulk.
As mentioned, Imsanity is free.
reSmush.it

Another image plugin worth taking a look at is reSmush.it. It’s a free image compression and optimization plugin that helps you reduce the size of PNG, JPEG, and GIF files.
You can upload images that are up to 5 MB each and it allows you to optimize all of your images at once. It’s also possible to deselect specific images if you want to exclude a few from the process.
This easy-to-use plugin produces lossless images that look great while taking up less room on your site. They also load much more quickly. It’s based on the reSmush.it API and available on all the popular CMS platforms.
Currently, reSmush.it is absolutely free to use and doesn’t have a paid version.
Robin Image Optimizer

The Robin Image Optimizer plugin is another easy way to add image compression and optimization directly into WordPress. This plugin promises compression at a rate of up to 80% with no quality loss. You can upload as many images as you want but it does limit file size to 5 MB each.
The plugin uses Cron to optimize images in the background while you’re performing other tasks. You can also use it to optimize all of your old images at once. Image backup is included, so you’ll never lose your original images and you do have some control over the level of compression provided.
In addition, there are detailed statistics about the optimization process as well as how much each image was compressed. Support is available via a forum and email support tickets.
Robin Image Optimizer actually uses the API of reSmush.it and they pledge to keep their service free as long as reSmush.it does, too.
Flying Images

Last on our list is Flying Images. This free plugin offers automatic image compression so whenever you upload a new image its size is reduced to your specifications. It relies on the Statically CDN and is powered by Cloudflare, which ensures your images are delivered swiftly.
Flying Images also provides WebP image conversion, should you wish to use it. Other features include responsive and adaptive images, lazy loading, and minified JavaScript.
So in reality, you’re getting some of the features of a full site optimization plugin here encased in an image-focused one. It even optimizes your site’s HTML, promising to “catch” and optimize all images – even those added via gallery plugins and the like.
As mentioned, it’s totally free to use.
How Do You Optimize Images in WordPress?
Having an image-heavy site can slow down its loading time. And this can make potential visitors bounce. Or it can make your site rank lower in SERPs. In any case, it’s bad news. However, there are easy ways to fix this issue.
By taking steps to improve your site’s overall speed, ensuring your images are in the right format and size, and then compressing them appropriately, you can greatly reduce site load times and improve user experience. Hopefully, this collection of tips, tricks, tools, and plugins will help you in your image optimization efforts.
What is your preferred image compression tool? Let us know in the comments section below.
Перевод: https://pressjitsu.com/blog/optimize-images-wordpress-40-tools-tips-plugins/